Chocolate Peanut Butter Swirl Protein Ninja Creami
This post may contain affiliate links.


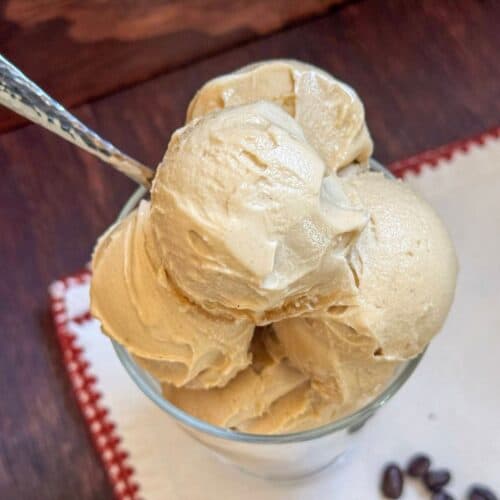
Have you ever swirled two flavors in a Ninja Creami before? This Ninja Creami Chocolate Peanut Butter Swirl protein ice cream is the perfect way to try it out! This recipe combines my decadent chocolate protein ice cream and my peanut butter protein ice cream into individual layers to make each flavor stand out.
Recipe at a Glance
⏱️ Prep Time: 15 minutes
❄️ Freeze Time: 24 hours
🍽️ Servings: 1 pint
👍 Difficulty: Medium
😋 Recipe Highlights: Two distinct, luscious layers delivering 59g protein per pint! Rich black cocoa, creamy peanut butter, and the perfect, indulgent texture.
🛒 Featured Ingredients: Whey protein, powdered peanut butter, cocoa powder, cottage cheese, sugar-free toffee flavor syrup
💪 Macros: 376 calories, 59g protein, 6g fat, and 43g carbs
SUMMARIZE & SAVE THIS CONTENT ON
This recipe is the ultimate chocolate peanut butter indulgence made right in your Ninja Creami without heavy cream or sugar!
This two-layer swirl recipe delivers two distinct, ultra-creamy chocolate and peanut butter flavors in one pint, packing 59g of protein into it making it perfect for those on a fitness journey.
After making hundreds of Ninja Creamis, I’ve figured out how to split the pint into two flavors–in this case, a rich black cocoa and nutty peanut butter that stay separate after spinning, mimicking the delicious flavor of Reese’s peanut butter cups.
For another delicious Creami flavor, try my protein cookies & cream ice cream and my mint chocolate chip Ninja Creami!
Making Flavor Swirls
I first tried this concept by making a Superman ice cream replica for my kids. That particular ice cream was all one flavor (Tutti Fruitti made from my Ninja Creami Vanilla Base Recipe) but I divided it into 3 so I could add a natural food coloring to each one.
I froze them in layers, 1/3 at a time. When I went to spin it, I was amazed at how well it did! I could clearly see each color in the pint cup, and no, it did not just blend all together.
My next experiment was to do this for protein ice cream. I made a Mounds Bar-inspired Ninja Creami protein ice cream where I swirled chocolate and coconut ice cream together. It is still one of my all-time favorite Ninja Creami ice creams (tied with my Apple Cinnamon protein ice cream).
My husband is a big fan of the chocolate-peanut butter combo, so this flavor was a logical next step. For more peanut butter chocolate treats, try my peanut butter Oreo Ninja Creami ice cream.
Key Ingredients
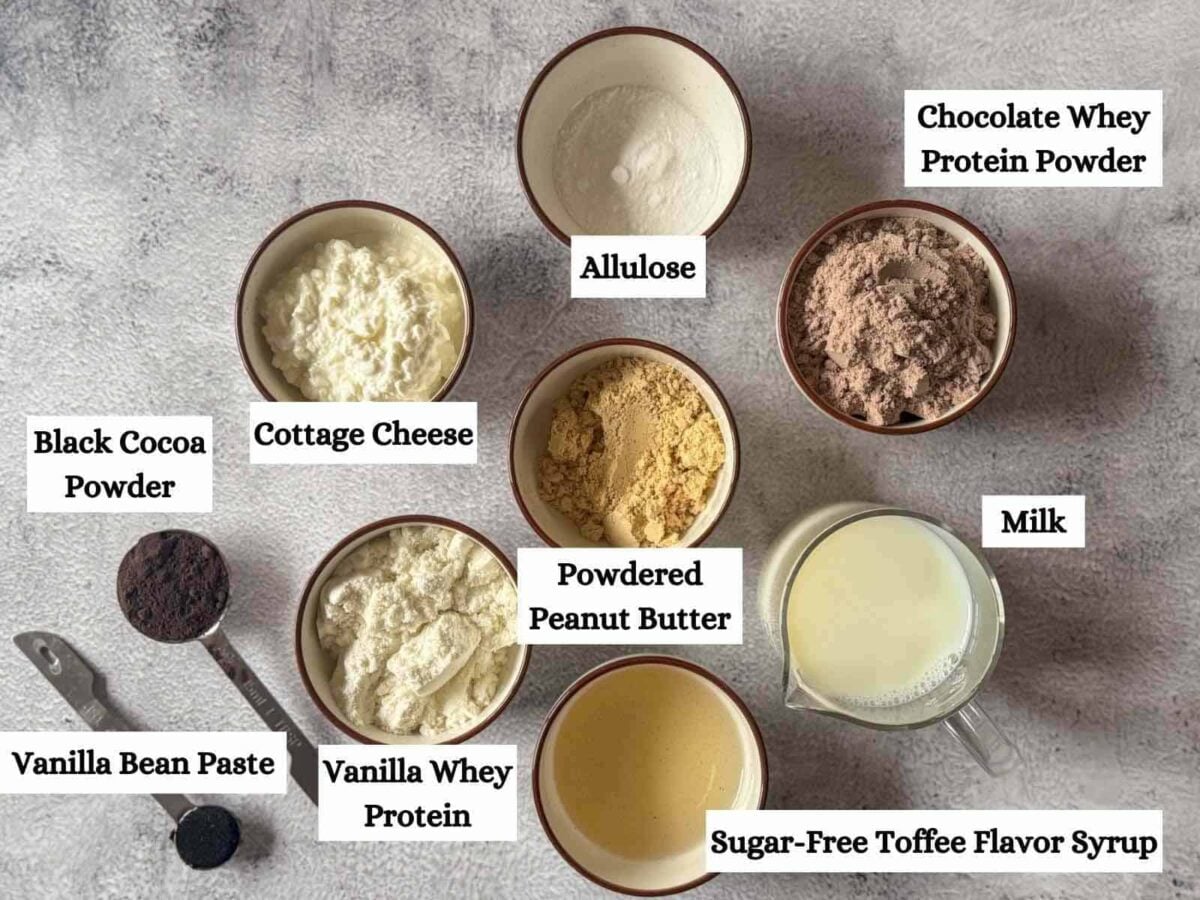
These are the key ingredients to make this protein-packed flavor swirled homemade ice cream! For a full ingredient list, check the recipe card.
Cottage Cheese – I use 2% cottage cheese as a binder for both flavors of ice cream. Binders are what stabilize your ice cream to create a creamy texture.
You can also use Greek yogurt if cottage cheese weirds you out too much, but I promise you can’t taste it. 😉
Whey Isolate Protein Powder – You will need both a chocolate protein powder flavor and a vanilla flavor for this.
I am really loving Legion protein powders these days. The ingredients are great and it makes awesome ice cream. It is sweetened with stevia, though, so if you don’t like stevia you will want to choose a different brand.
Peanut Butter Powder– Powdered peanut butter gives our peanut butter layor perfect nutty flavor without all of the fat and calories of regular peanut butter.
Toffee Flavor Syrup – Sugar-free toffee flavor syrup accentuates the peanut butter flavor. I get a giant bottle of it pretty cheap at TJ Maxx.
If you don’t have access to toffee flavor syrup, it can be left out, but add another 1-2 tbsp sweetener in its place.
Black Cocoa Powder – Regular cocoa powder can also be used, but I tell you…if you want a RICH chocolate flavor, opt for black cocoa powder. Many people love Dutch process cocoa powder for ice cream due to its lower acidity and mellow flavor.
Chocolate-Peanut Butter Ninja Creami Instructions
Here are the instructions for Chocolate Peanut Butter Swirl Protein Ice Cream:

- Prep Peanut Butter Base: Add all of the ingredients for the Ninja Creami peanut butter ice cream recipe as listed in the recipe card, adding a splash more milk if needed to reach the max fill line of the pint container. Blend with an immersion blender until smooth.

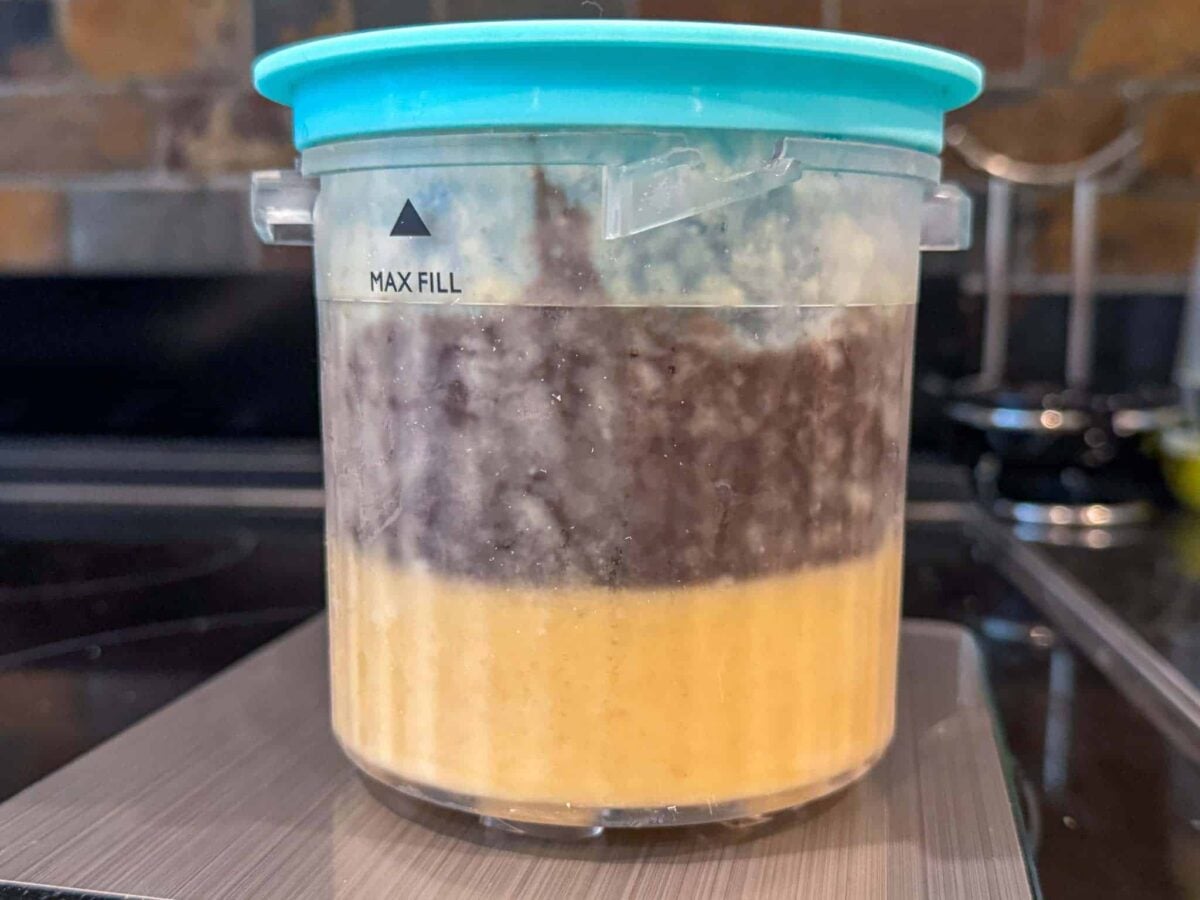
- Divide in Two: Pour half of the peanut butter base into a second pint container. Place lids on the pints and put them in the freezer for a few hours until they are frozen enough not to mix when you pour the chocolate layer on top.

- Make, Divide, & Freeze Chocolate Base: Take out a quart-size wide-neck jar or other bowl. Add the chocolate base recipe ingredients to the jar and blend with an immersion blender, then place in the refrigerator until the base peanut butter layers are ready for it.
When the bottom layers are frozen, take the pints out of the freezer and pour half of the chocolate base on top of each one. Place the storage lid on each one and put them back in the freezer on a level surface for 24 hours.

- Spin on Light Ice Cream: After 24 hours have passed, remove one of the pints from the freezer. Install it into your machine per the instructions for your model. Press the “Lite Ice Cream” button and let it spin.

- Re-Spin: After the first spin completes, check the texture of your ice cream. You will likely want to do a re-spin.
Re-install the pint container into the Ninja Creami machine and press the “Re-Spin” button. Try to avoid doing more than one re-spin, and do not add any liquid.

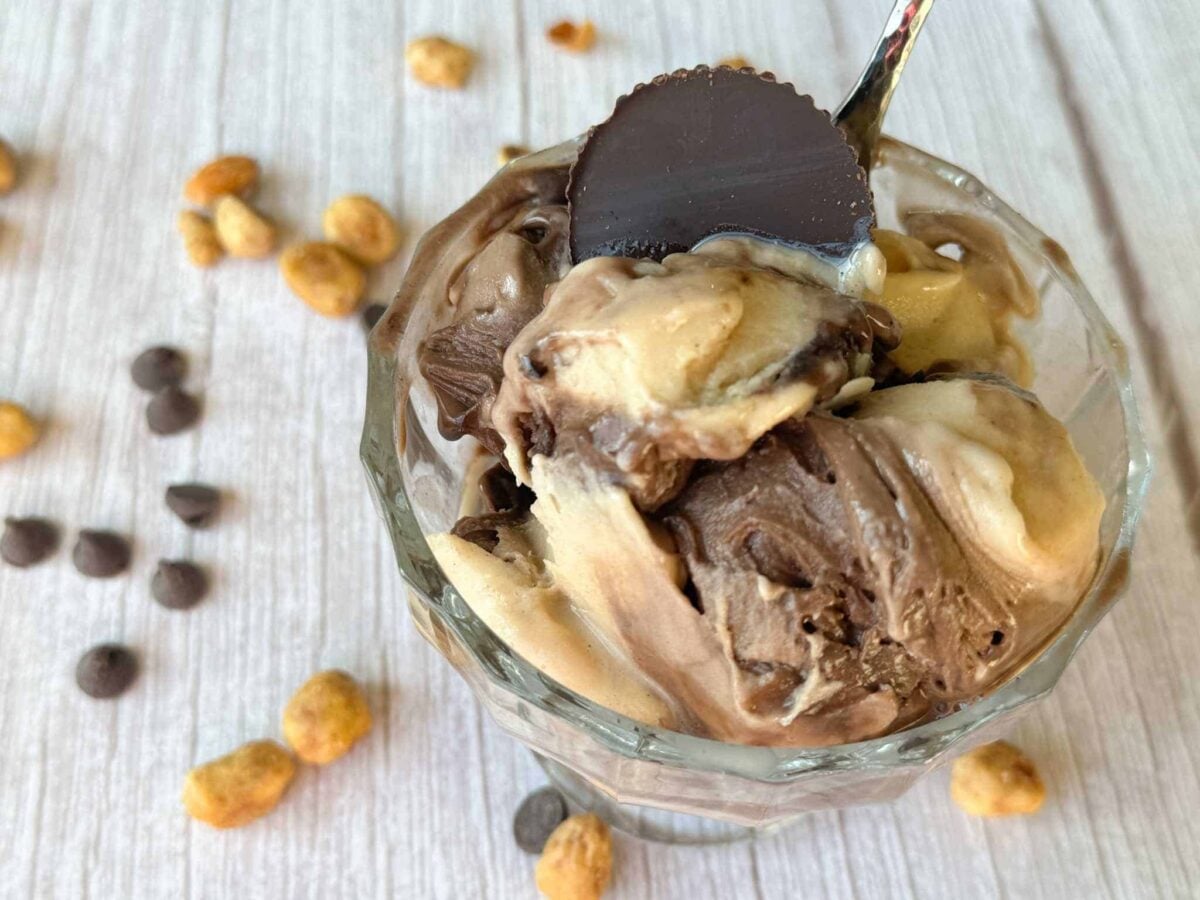
- Enjoy! Top your ice cream with some low or no-sugar-added peanut butter cups.
Chocolate chips and peanuts also make a delicious addition!
Expert Tips for Perfect Flavor Swirls
Many people say mixing flavors doesn’t work, but I’ve never had it fail. In trying to analyze what makes my technique successful, I’ve come up with the following tips and considerations:
- You Need a Firm Ice Cream Base
It is pretty common in the healthy ice cream world to make soft-serve style, fluffy ice cream. While that’s certainly delicious, I don’t think a soft texture can maintain its flavor separation as well when the machine is spinning the pint. Make sure you’ve frozen the base at least 24 hours as well. - Minimize Re-Spins
For most of my Ninja Creami recipes, I do one spin on “Lite Ice Cream” followed by one “Re-spin.” My recipes should not need more than that. I think that’s an important piece of this puzzle–the more spins you do, the more opportunities you give the layers to mush together, so we want to minimize re-spins. - No Added Liquid at the Re-Spin
Many people add liquid before a re-spin. This is unnecessary–my recipes here at Sweet Simple Things do not need this. This technique works with base recipes like mine–I cannot promise this technique will work for other styles of recipes. - Put the Lighter Flavor/Color on the Bottom
While the color swirl will work no matter what order you do the layers, I have found the best results to be the lighter color on the bottom. It appears as if the top layer is more prone to color mixing than the other way around. - Need to troubleshoot? If you’re having issues with your Ninja Creami machine, check out my Ninja Creami Troubleshooting Guide.
Other Ninja Creami Recipes
Check out my Ninja Creami ice cream recipes page for all of my delicious flavors, like my lemon Ninja Creami and my Ninja Creami orange sherbet.


Want More Recipes Like This One?
If you love my Ninja Creami recipes and want some more fun flavors like S’Mores, Pistachio, Monster Cookie, Black Forest Cake, or even Moose Tracks, check out my Ninja Creami Recipe eBook!
The recipe book is available for instant download and offers delicious recipes in an easy-to-access eBook without any ads.
Try this Flavor Swirl Today and let me know how it goes! Please come back to leave a comment and review! I love to hear from everybody who tries my recipes. 🙂
📖 Recipe

Ninja Creami Chocolate Peanut Butter Swirl
Equipment
- 1 Ninja Creami Ice Cream Maker
Ingredients
Peanut Butter Protein Ice Cream
- 100 grams 2% cottage cheese 1/2 cup
- 1 scoop vanilla whey isolate about 30-35 grams depending on brand
- 20 grams powdered peanut butter like pbFit (2 tbsp + 1 tsp)
- 1 tablespoon granulated allulose
- 2 tablespoon sugar free toffee flavor syrup
- 1/2 teaspoon vanilla bean paste
- 1 cup skim milk or unsweetened coconut milk up to 1 1/4 cup if needed
Chocolate Protein Ice Cream
- 100 grams 2% cottage cheese about 1/2 cup
- 50 grams chocolate whey isolate protein powder about 1.5 scoops
- 12 grams black cocoa powder about 1.5 tbsp
- 2 tablespoon granulated allulose
- 1/2 teaspoon vanilla bean paste
- 1 cup skim milk or unsweetened coconut milk up to 1 1/4 cup if needed
Instructions
- Start by making the peanut butter flavor. Put all ingredients into a pint container and blend with an immersion blender.
- Grab a second pint container and pour half of the peanut butter mixture into the second pint cup. Each cup should be close to half full, but it doesn't have to be perfect.
- Put a lid on each container and freeze on a level surface in your freezer for 24 hours.
- Next, make the chocolate mixture by combining all of the chocolate ice cream ingredients into a jar or bowl and blending them. Put this mixture into the refrigerator until the base layers are frozen enough.
- When frozen, pull the two peanut butter pint containers out of the freezer and remove the lids. Divide the chocolate mixture evenly over the top of each. Place the lid back on each and stick them back in the freezer for 24 hours.
- When ready to eat, pull one of the pints from the freezer and install in the Ninja Creami machine per the instructions for your model. Spin on "Lite Ice Cream." When the spin completes, remove the pint and check the texture. If needed, put the pint back in the machine and press the "Re-Spin" button. Do not add liquid, and try not to do more than one re-spin for the best swirl results.
- Enjoy! See notes for more tips regarding the swirl.
Video


I am intrigued with the ice cream recipes but have to do ours lactose free. So whey protein powder is out. Can I just eliminate it? I believe I can get lactose free cottage cheese now si I want to try that. I haven’t gotten the ninja machine yet because I’m not sure if I can do your recipes without the protein powders.
Thanks!
StaC
Hello! You can try a different protein powder that suits you. I wouldn’t leave it out completely as it’s really the protein that thickens the ice cream up, especially in the absence of fat like heavy cream. While I have not tried it myself, I have heard that both egg white protein and bone broth protein make good ice cream! You could also look into a plant protein powder.
This was great–I didn’t know you could swirl flavors. Was a fun recipe to try and will make again.
Glad you liked it, Joe! 🙂 We love this one over here, too!