Whole Wheat Pita Bread with Fresh Milled Flour – Pillowy Soft
This post may contain affiliate links.


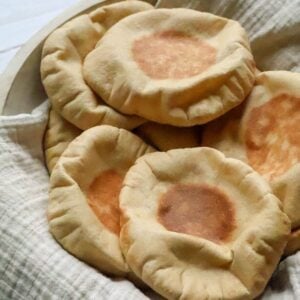
This 100% whole wheat pita bread recipe is perfect for home-milled, fresh milled flour. It’s soft, pillowy, and make perfect pockets that are durable enough to stuff! These fresh pita pockets are easy to make, nutrient-dense, and wholesome.

One of our favorite healthy dinners as a family is a hearty stuffed pita pocket. Grilled chicken with lemon sauce is my middle son’s favorite, but we love stuffing it with anything! Shawarma, gyro meat, kebabs…whatever you fancy.
Pitas bought at the store just aren’t very good. Homemade is where it’s at!
When possible, I prefer whole grain bread products that are milled fresh at home, like my fresh milled sandwich loaf, whole wheat cinnamon rolls, or my cranberry wild rice bread. This wholesome recipe couldn’t be easier and is designed for home-milled flour. That said, it will work fine with bagged whole wheat flour, too.
These fresh milled pitas are going to rally for the top spot in your whole-grain baked goods recipes.
Ingredients

You need only a handful of real-food ingredients to make these delicious whole wheat pita bread! Here are some of them:
Whole Wheat Flour – I recommend milling your flour from hard white wheat berries. It makes a nice, stretchy dough that is light & fluffy. If using bagged flour, you can find this labeled as white whole wheat. Make sure your package says whole wheat– do not confuse it for white flour. White whole wheat is still whole grain– white just refers to the color of the kernel.
Instant Yeast – This recipe is designed using instant yeast (quick yeast). I find instant yeast more powerful and yields better results with whole wheat, fresh milled flour. If you only have active dry, you can use it but you will need to proof the yeast before using. See the “Substitutions” section for more info.
Honey – Honey provides food for the yeast, a touch of sweetness, and softens the dough.
Extra Virgin Olive Oil – Olive oil also softens & conditions the dough and adds healthy fats.
See the recipe card for the full ingredient list.
Easy Step-by-Step Instructions

1. Weigh & Mill Flour
Weigh out 535 grams of hard white wheat berries using a food scale. Mill into flour. If your grain mill loses a few grams in the process, make sure to add an extra gram or two to your wheat berries when milling. You want 535 grams of finished flour.

2. Autolyse Flour
Pour the flour into the bowl of a stand mixer (you can also mix by hand). Add the warmed water, honey, & olive oil. Mix to evenly combine. Cover and let sit about 30 minutes before continuing.

3. Knead & Rise
After the 30 minute rest, sprinkle the instant yeast and salt on top of the flour mixture. Use the dough hook attachment on the mixer to knead the yeast and salt into the dough, then continue kneading until you a get a smooth and supple ball of dough–about 10 minutes. You can also knead by hand.
Cover the dough and let rise in a warm place until doubled, about 60-90 minutes.

4. Prep for Baking
Toward the end of the rise, place a baking stone, baking sheet, or large cast iron skillet into the oven. I recommend inverting the baking sheet or skillet so it is easier to transfer the pitas to & from the oven without the rims getting in the way.
Preheat to 500°F and make sure the stone/sheet/skillet preheats at least 20 minutes before starting to bake the pitas.

5. Divide Dough
When doubled, pour the dough out onto a clean work surface. Use a food scale to evenly divide into 12 pieces, about 80 grams per piece.
Roll each section into a ball and cover with a lightly damped tea towel to keep them from drying out as you work.

6. Roll Pitas
Grab one of the dough balls and roll it out with a rolling pin into a circle about 6-7 inches in diameter. If you have the space to bake 2 at a time, repeat with a second ball.

7. Bake Pitas
Open the oven and place the rolled-out pitas on the baking pan. Close the oven and let it cook for 2-3 minutes until they have puffed.
As soon as they puff up, use a pair of tongs to flip the pitas over. Bake for one more minute.

8. Wrap in Towel
Remove baked pitas from the oven and wrap in a clean tea towel to keep soft & warm as you work.
Roll out your next pita breads and repeat the process until all of the pitas are baked.
Would you like to save this?
Tips & Tricks for Perfect Pitas
Oven needs to be HOT.
To get the pitas to puff up properly and not stick, the oven needs to be very hot, and the pan you are baking them on needs to be thoroughly preheated.
I use an aluminum baking sheet which preheats relatively quickly. If you are using a thick cast iron skillet or a baking stone, you may need to let them preheat 20-30 minutes before you start to make the pitas.
Invert Your Baking Sheet or Skillet
If you are not baking on a baking stone, then I recommend inverting your skillet or baking sheet if it has a rim (turning them upside down). If your baking sheet only has a rim on one end, such as an Air Bake pan, then it is not necessary to invert it.
The reason you would invert the pan/skillet would be so that you can work quickly to get the pitas in and out of the oven & flip them over without too much fuss. You don’t want to burn yourself while you work around the rims!
Bake in Small Numbers
Pitas bake very fast, and you need to pay attention to them. When I use a half-sheet pan, I can only make two at a time. When I’m using a cast iron skillet, I only bake one at a time.
Serving Suggestions
We love stuffing these with chicken shawarma, grilled chicken, shredded rotisserie chicken, or gyro meat (check out my gyro fries recipe for a quick and easy dinner!)
Serve my Turkish Red Cabbage Salad on the side and top with some feta, tzatziki sauce, sliced tomato, and microgreens.
They also make great pb&js! 😉

Substitutions & Variations
Bake on the Stove Top
If you need to bake these on the stove top, you may do so. Preheat a cast iron skillet on medium-high heat until thoroughly hot. Spritz a little bit of olive oil or avocado oil onto the skillet before placing your first pita.
Cook one pita at a time, flipping after two to three minutes, and then cooking for one to two minutes more.
Baking on the stove top usually means the pitas won’t get a full puff, usually just some bubbles. That is fine, and they will still taste delightful. However, if puffy pockets are important to you, bake them in the oven.
Red Wheat vs. White Wheat
Hard red wheat, or regular whole wheat flour, can be used in place of hard white wheat.
Replacing the Honey
If you are vegan or otherwise avoid honey, you can use maple syrup or agave syrup.

Related Recipes
Give some of these other whole grain baking recipes a try:
- Fresh Milled Whole Wheat Bread – This sandwich bread is soft, fluffy, and is super kid-friendly!
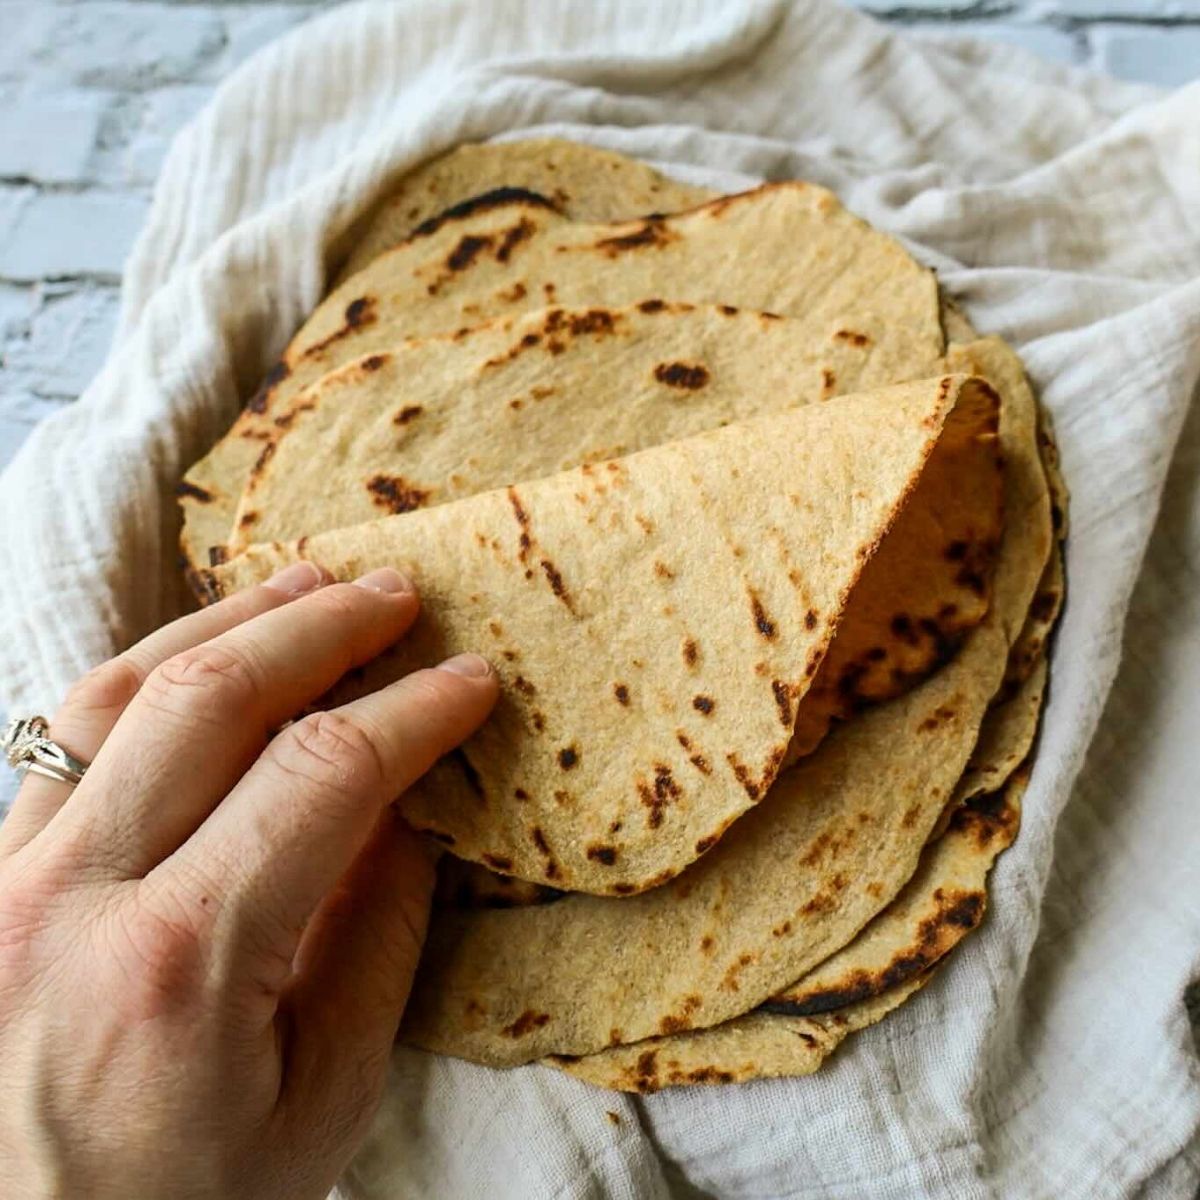
- Freshly Milled Whole Grain Tortillas – These are perfect for tacos, burritos, enchiladas, and more!
- Fresh Milled Sourdough English Muffins – Pumpkin spice English muffins made with fresh milled wheat.
- Whole Wheat Sourdough Bagels – Chewy, whole wheat bagels perfect as part of a balanced breakfast.
- Fresh Milled Cheesy Garlic Knots – Whole wheat garlic knots wrapped with mozzarella and pesto.
- Whole Wheat Sourdough Bierocks – Served with a delicious beer cheese fondue, this nutrient-dense remake of a classic recipe is sure to become everone’s favorite!
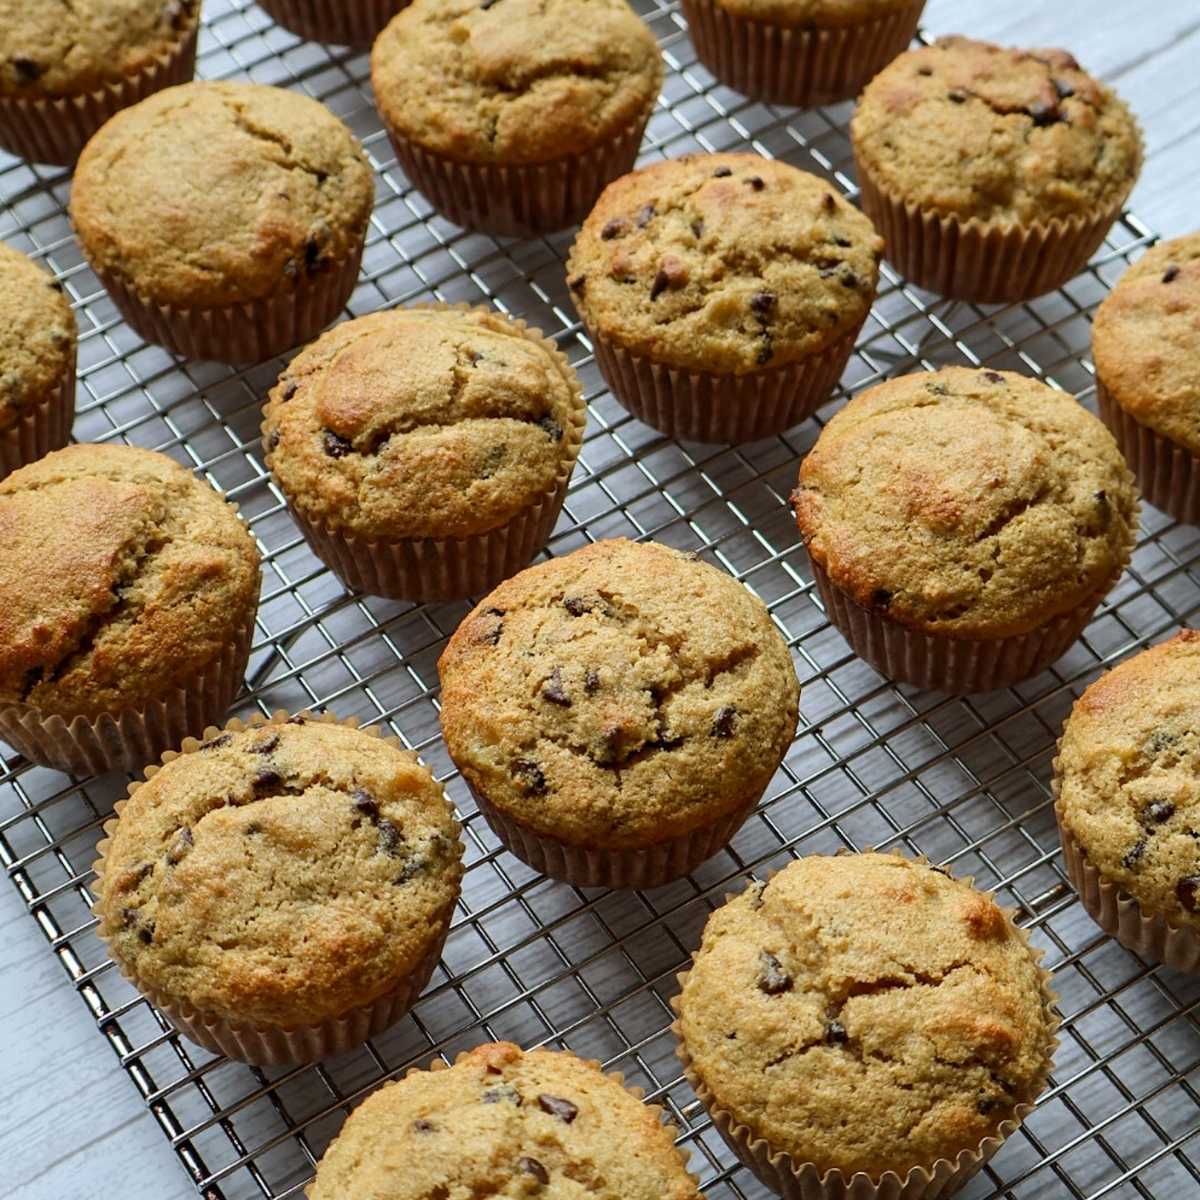
- Fresh Milled Banana Muffins with Chocolate Chips are the perfect afternoon pick-me-up.
- Fresh Milled Flour Pizza Crust – This dough recipe can get your pizza made in under one hour!
- Gyro Fries – Super easy and tasty loaded fry recipe!
- Moroccan Sheet Pan Chicken – A delicious & healthy chicken sheet pan meal with some orange flair.
- Caprese Chicken Sheet Pan – Another Mediterranean-inspired chicken sheet pan meal that everyone will love!
For a list of foolproof fresh-milled flour recipes, check out this post.
FAQS
Greek-style pita is flatbread style of pita. Rather than stuffing the pita pocket like you would with an Arabic-style (Levantine) pita, you would use a Greek pita more like a wrap. Because there is no pocket, Greek-style pita is thicker and puffier.
Greek-style pita is best for wrapping or dipping. Arabic-style pitas are best for stuffing or for a lighter meal.
If you desire a Greek-style pita, I recommend cooking these pitas in a skillet on the stovetop rather than in the oven to prevent them from puffing. Make sure you do not roll them too thin.
Yes, whole wheat pita bread would be considered healthy in the context of most people’s diets. Freshly milled whole grains are rich in many vitamins, minerals, and fiber, which supports optimal digestion. Whole grain consumption is consistently associated with lower cardiovascular disease mortality.
That said, most people benefit by eating balanced meals, which would mean including other food groups with your whole grains. Adding protein and healthy fats will keep you fuller longer, mitigate excessive glucose spikes (remember–most glucose spikes are normal, but certain people experience exaggerated spikes which can be harmful), and help you meet all of your dietary needs throughout the day.
What spikes one person’s blood sugar does not necessarily spike the next person’s blood sugar. There are too many physiological differences between people to make a general claim. Healthy, active people without insulin resistance do not typically need to worry about foods that spike blood sugar. With a properly functioning pancreas, our body can deal with blood sugar fluctuations without too much drama.
That said, many people do deal with some blood sugar dysregulation–they may be pre-diabetic, diabetic, under-muscled (as muscles are great storage vehicles for glucose), or perhaps have allergies and sensitivities to wheat that make consuming it not the best idea.
Whole wheat pita bread, such as this recipe, contains more fiber, vitamins, and minerals than pita bread made with refined flour. Fiber plays an important role in our metabolic health— it slows down the interaction of carbohydrates, proteins, and fats with our digestive enzymes. It strengthens our intestinal gut linings which prevents toxins from leaving your gut and entering your bloodstream, and it slows the absorption of sugar, leading to a more stable blood glucose level.
If you have concerns about how to fit carbohydrates into your diet, such as pita bread, please contact your doctor’s office and ask how to get connected to a registered dietician.
Calories Whole Wheat Pita Bread
Per one whole wheat pita, the approximate nutrition facts are:
- 187 calories
- 33 grams of carbohydrates
- 6 grams of protein
- 4 grams of fat
- 5 grams of fiber!
Nutrition information is an estimate based on my chosen ingredients and calculated with software. Your nutrition facts may vary, especially if you alter the ingredients or the serving size.
Leave a 5-Star Rating & Review!
If you make this recipe, please come back and let me know how it went by leaving a comment & review! I love to hear from all of you, and I reply to every comment. 🙂
📖 Recipe
Fresh Milled Pita Bread
Equipment
- Mixer
- kitchen scale
- Rolling Pin
Ingredients
- 535 grams hard white wheat flour fresh milled, about 4 cups + 2 tbsp
- 360 grams water warmed to about 100-110° (1 1/2 cups)
- 21 grams honey 1 tbsp
- 42 grams extra virgin olive oil 3 tbsp
- 7 grams instant yeast 2 1/4 teaspoons (1 packet)
- 12 grams sea salt 2 teaspoons
Instructions
- Weigh out 535 grams of hard white wheat berries using a food scale. Mill into flour. If your grain mill loses a few grams in the process, make sure to add an extra gram or two to your wheat berries when milling. You want 535 grams of finished flour.535 grams hard white wheat flour
- Pour the flour into the bowl of a stand mixer (you can also mix by hand). Add the warmed water, honey, & olive oil. Mix to evenly combine. Cover and let sit about 30 minutes before continuing.360 grams water, 21 grams honey, 42 grams extra virgin olive oil
- After the 30 minute rest, sprinkle the instant yeast and salt on top of the flour mixture. Use the dough hook attachment on the mixer to knead the yeast and salt into the dough, then continue kneading until you a get a smooth and supple ball of dough–about 10 minutes. You can also knead by hand.7 grams instant yeast, 12 grams sea salt
- Cover the dough and let rise in a warm place until doubled, about 60-90 minutes. Toward the end of the rise, place a baking stone, baking sheet (invert your baking sheet if it has a rim), or large cast iron skillet into the oven. Preheat to 500°F and make sure the stone/sheet/skillet preheats at least 20 minutes before starting to bake the pitas. If you wish to cook in a skillet on the stovetop, see notes.
- When doubled, pour the dough out onto a clean work surface. Use a food scale to evenly divide into 12 pieces, about 80 grams per piece. Roll each section into a ball and cover with a lightly damped tea towel to keep them from drying out as you work.
Baking the Pitas
- FYI: Pitas bake quickly, but you can only bake a couple at a time. The full baking process can take anywhere from 20-30 minutes.
- Grab one of the dough balls and roll it out into a circle about 6-7 inches in diameter. If you have the space to bake 2 at a time, repeat with a second ball.
- Open the oven and place the rolled-out pitas on the baking pan. Close the oven and let it cook for 2-3 minutes until they have puffed. As soon as they puff up, use a pair of tongs to flip the pitas over. Bake for one more minute.
- Remove baked pitas from the oven and wrap in a clean tea towel to keep soft & warm as you work. Roll out your next pita breads and repeat the process until all of the pitas are baked.
Video


YUM!
I love when I find a FMF recipe and it actually turns out great. Will definitely make again.
Any suggestions on how to store if I make them 3-4 hours before we eat them?
So glad you loved them! 🙂 After I’m done making them, I keep them wrapped up until they cool in a clean kitchen towel. This will help absorb the condensation while it cools. Once mostly cool, you can transfer to any airtight container.
Absolutely incredible. Delicious, soft, and easy. My yeast weighed different, so I would recommend using measuring spoons for the yeast and salt (instead of weight – grams).
Glad you loved them! 🙂
Thank you so much for this awesome recipe!! it was super easy! turned out great and delicious!! I had a problem but it wasn’t the recipe. It seems like my oven has a problem, only 1 of 2 pitas would puff. So my oven temp is off on the left side. Even the less puffy one is yummy and I could gently find the pocket. Your video is extremely helpful and well done. You are easy to watch and understand. So please don’t stop teaching us! I’ve already shared this recipe with 2 of my friends!
So glad you loved the recipe!! 🙂 hope you can figure out a trick with your oven. Each batch I make, I usually get one that just doesn’t puff right for a reason I haven’t quite pinned down, but 11/12 ain’t bad!
SUCH A GREAT RECIPE! They came out soft, fluffy and puffed up great in the oven. Will be my go to recipe now. Thank you!
Love to hear that! 🙂 So glad they worked out for you!
I would like to make these a day ahead… what would you suggest? Freezing them or putting them in a bag?
They should be fine in a bag if it’s just one day ahead. Any more than that, then I would freeze. 🙂
Amazing recipe. I did freze once cooled from the oven. I’ve learned fresh milled goods need to be eaten right away or frozen
Yes, these freeze wonderfully, too! 🙂 I like to make double batches when I make them so I can freeze a bunch for a future meal or two.
Made these yesterday and they are amazing! I was so giddy watching them puff up in the oven. We had ceasar chicken sammies in them last night – perfection! Thank you for sharing your recipe.
That sounds amazing, Melissa!! I have some frozen pitas from my last batch I made–caesar chicken sammies sounds like a great way to eat them! 🙂
will active dry yeast work as well? Or only instant?
Hi Marie! You can use active dry as well. Active dry will need to be proofed in some of the recipe liquid (warm, but not exceeding 110°F) before mixing the rest of the ingredients in once nice and foamy, so it will need to be added in step 2 instead of step 3. Since the yeast will be active right away, keep the dough rest/autolyze on the shorter side.
Hello, I had issues with my puffing as well. I’ll let my oven heat 45 minutes first on the pizza stone when that didn’t puff. I tried the sheet pan method and it still never puffed so I’m trying to figure out what I did wrong. It’s very frustrating.
Hello! I’m so sorry you had trouble getting them to puff up. Have you ever used an internal thermometer to check the temp inside the oven? Sometimes they just don’t run as hot as what you have set them at. Gas ovens seem to be prone to this especially, but even electric ovens can have a discrepancy. For many things, it doesn’t matter if the oven if off a bit, but for some things (like pita) it makes a big difference. The puff happens when the inside steams up and gets trapped because the outside crust is set. If it’s not piping hot, the steam just escapes from the center because the crust didn’t set as quickly. I would try setting your oven 25 degrees higher next time just to see if that helps.
Mine won’t puff up. What am I doing wrong
Hi Laurie! Sorry to hear they didn’t puff up. Without knowing exactly your process, here are some things I’ve noticed & learned along the way that seem to make a difference:
1) make sure your oven is very hot, and make sure you pre-heat the baking sheet or stone before baking. You may need to get an external oven thermometer to check the temperature. At my old house, I learned I had to set my oven 25 degrees higher than what I was supposed to because the internal temperature just did not seem to get where it needed to go, and that was a brand new Samsung oven, too.
2) experiment with rolling different thicknesses. I aim for about 1/4 inch, but if we are all eyeballing it we may have different ideas of what that is. Rolled both too thick or too thin will impact whether it gets puffy or not.
3) make sure the oven rack is not set too high. I use the middle rack, but maybe it would work better for you on the bottom rack. Too much top-down heat too early in the baking process may set the crust on the bread before it can puff.
4) some grains/flours absorb more water than others (or even the same grains but different batches may absorb water differently). Did the dough feel too stiff do you think? You want to make sure the dough isn’t too dry. If needed, your grains may require some extra tablespoons of water. I would add just a little at a time until the dough is soft and a little sticky, but still coming away from the sides of the mixing bowl.
Hope something there is helpful! Let me know how it goes.
These were easy and delicious! I actually multiplied all of the ingredients 1.5 times so we could get just a bit more. Only a few of them puffed all of the way. Some of them only puffed up halfway, most stayed flat. I did the sheet pan in the oven. I wasn’t sure if I wasn’t getting them rolled out fast enough?
Glad you loved them! 🙂 could be a few reasons—all ovens run a bit differently, yours might have lost some heat each time the oven was opened and then maybe it wasn’t hot enough. Another thing I have noticed when making them is if I don’t roll them thin enough, they don’t puff as well. If they’re too thick I think they take too long to bake through and just don’t quite get as puffy. I’m still able to pull them apart into a pocket if I cut the end and pry with a fork though!
These turned out great using half red and half white hard spring wheat. I had to use a touch more water than what the recipe called for. Rise took about 75 minutes. With baking them on a stone, they puffed in 2 minutes. So much fun.
Glad you liked them! 🙂 Sounds great!
These came out so good! It’s going to be one of my go-to recipes. The only thing that needs to be changed is where the recipes says how long it takes to make them. You need more time for the dough to rise. They take more than 103 minutes. Even so, they are easy, tasty and worth the time!
So glad you liked them! Rise time will vary a bit, depends on the strength of your yeast and room temp. But thank you for pointing this out—it made me peek at the recipe card to make sure it is correct. My total time is calculated by the calculator in the software and there did appear to be errors in the total time. I fixed that, but the timings written in the recipe itself should be close to accurate for most people, but always watch the dough and not the clock. 🙂