Easy Fermented Cherry Tomatoes with Basil & Garlic
This post may contain affiliate links.


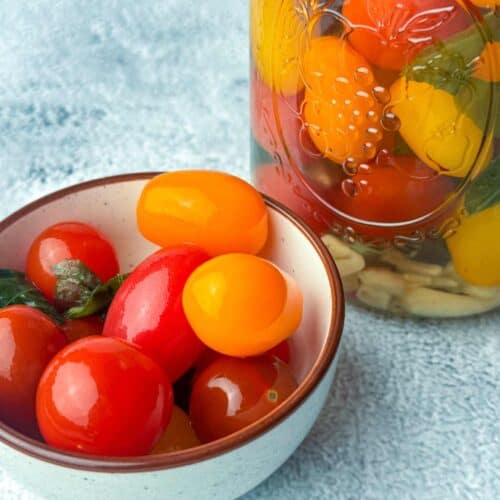
You will love these fun and fizzy fermented tomatoes! With fresh basil and garlic, these fermented cherry tomatoes are a great way to eat more fermented foods or preserve your garden harvest during tomato season. Super refreshing and fun to eat, this will quickly become one of your favorite tomato recipes!

What is Lacto-Fermentation?
Lacto-fermentation is one of the most popular methods of fermentation for foods. Most of the fermented foods we think of, like saurkraut, kimchi, sourdough, and yogurt, are lacto-fermented.
If you’re new to the fermenting process, lacto-fermented tomatoes are a super easy way to get your feet wet. They are also really fun to eat! Fermented cherry tomatoes get effervescent, or fizzy inside when properly fermented. It’s a lot of fun for your taste buds, and they are delicious.
If you are fermenting for the first time, please read through this whole article to get all the tips and tricks to make sure you’re successful. If this is not your first time, you can click below to skip to the recipe, but this article gives tons of tips you may be interested in reading!
Jump to Recipe
A Perfect Lacto-Fermentation Environment
Lacto-fermentation is a specific type of fermentation that uses lactic acid-producing beneficial bacteria as a preservation method for food. This type of fermentation creates an environment where good bacteria and some yeasts can thrive to break down starches and sugars in a way that not only extends the shelf life of that food but also produces many health benefits.
The ideal lacto-fermentation environment helps good bacteria, yeasts, and fungi to proliferate while being inhospitable to bad bacteria, yeast, and fungi.
Creating the perfect lacto-fermentation environment is done in many different ways depending on the food, but for most lacto-fermented vegetables, the preferred lacto-fermentation process uses a salt brine.
After submerging the vegetables in the salt brine, they are topped with a fermentation lid and left to ferment for a period of time. The length of time varies for each vegetable. For these fermented tomatoes, we will ferment for 5-7 days.

Fermenting Equipment
There are many ways to ferment vegetables, and many different types of lids, weights, jars, crocks, etc. What I am going to show you here is how *I* like to do it with my simple recipe. My goal was to find the easiest, most foolproof way because I knew that would be the best way for me.
To make fermentation easy, there are a few pieces of recommended equipment that will make for a successful ferment.
Food Scale
Most importantly, you need a food scale. Since we are talking about food safety, I believe precision is important. While lots of people ferment without a scale, that is not how I prefer to do it.
When I was first learning to ferment, I did not use a scale, and I ended up with many moldy, rancid things. If you are serious about fermenting, a food scale is relatively inexpensive and worth the investment. It also has so many uses outside of fermenting, such as baking. Once you bake with a scale, you’ll never go back!
In a nutshell, this particular recipe follows a process for creating a brine based on the total weight of the vegetables and water, then calculating a salt brine percentage (2.5% in this case) based off the total weight. This is a technique I learned on the Make Saurkraut website and it made a huge difference in the quality of my ferments!
Some people will simply make a brine based on the water volume which uses a higher percentage for the calculation. That is one reason why you sometimes see recipes call for a 2% brine or a 4% brine for the same thing–it may be that the brines are close to equal, but the methods are different. One is considering the weight of the vegetables and one isn’t. But vegetables are mostly water, too, and that water content does matter!
I was having too many fails with my ferments when I wasn’t considering the weight of the vegetables, so now I ferment based on total weight and it works much better for me.
Wide-Neck Glass Jars
I find quart-size glass jars to be the most practical for fermentation. They’re easy to find and relatively inexpensive. They also have more uses outside of just fermenting.
Make sure you have clean jars. However, unlike canning, they do not need to be sanitized for short fermentation periods (one reason I love fermenting!)
Sterilizing is optional, and for very long fermentation periods you may wish to consider it, but for a short fermentation that ends up in the refrigerator, like this recipe, you do not need to.
Fermenting Weight
A fermentation weight is important to keep your vegetables weighed down below the brine. Anything that gets exposed to air has the potential to mold, so we don’t want them floating.
Fermentation Lid
While you can ferment vegetables with regular lids, I am all about fool-proof. There are lots of fermentation lids out there, but I love my EZ Fermenter Lids. They make fermenting SO easy.
These lids have a one-way valve. As your fermented vegetables start producing more carbon dioxide, the gasses can escape, including any lingering oxygen, without letting any air in.

Ingredients
To make these delicious fermented cherry tomatoes, you need just a few fresh, simple ingredients:
- Cherry Tomatoes – Fresh tomatoes are best, and make sure they’re not turning over-ripe. Any small tomatoes, like grape tomatoes, work well.
- Fresh Basil – Look for vibrant, healthy basil at your grocery store or in your garden.
- Garlic Cloves – I used about half a head of garlic, peeled and roughly chopped.
- Sea Salt – Sea salt is a common choice for ferments, but you can also use other salts, such as Himalyan pink salt (which I often use!). You just need to make sure that they are non-iodized. Table salt is not recommended.
- Filtered, Non-Chlorinated Water
Instructions
Follow the steps below to make fermented tomatoes.

1. Weigh Your Jar
Weigh the mason jar on a food scale. Write down the weight of the jar in grams in case the scale gets uncalibrated during the process and you need to subtract it from the final weight later on. Then, tare the scale to zero.

2. Prep Basil & Garlic
Give the garlic cloves and basil leaves a rough chop. Do not chop them too small–this will make them less likely to float to the top when you add water. Set aside.

3. Layer Vegetables
With the jar sitting on the tared scale, add a layer of tomatoes to the bottom of the jar–about 1/4 of the way full. Top with some roughly chopped garlic and basil. Repeat with another layer of tomatoes, followed by more garlic and basil. Do this until the jar is nearly full–just under the neck–save room for the fermentation weight but do not leave too much head space, either–just enough for the weight, but do not place the weight yet.
Make tomatoes your final layer to weigh down the garlic and basil so they don’t float to the top.

4. Add Water
With your jar still on the scale, carefully pour your filtered water over the top of the tomatoes in the jar until covered, but remember to save room for the salt and fermentation weight. Check the scale & make note of the final weight of the vegetables and water. Write it down.

5. Calculate Salt
Take the weight you just wrote down (of the water + vegetables) and multiply it by 0.025. This number is the amount of salt you will use in grams to make a 2.5% salt solution. This will probably be anywhere from 20-23 grams for a quart-sized mason jar. Round to the nearest gram if needed. You can now remove your jar from the scale.

6. Add Salt
Measure out the salt. Take the number you calculated for the sea salt and measure into a small dish on your food scale. Pour the measured salt into your jar of vegetables and water. Place the fermentation weight on top and carefully press down–be careful so you don’t overflow water everywhere. The weight will help keep the veggies snug to prevent the garlic and basil from getting dislodged as you dissolve the salt. Screw a lid on top of the jar (I use my fermenting lid in the photo, but it’s best to use a regular waterproof lid for this part and switch to a fermenting lid after the salt is dissolved).

7. Dissolve Salt
Gently flip your jar back and forth, upside down and right side up, for a couple of minutes to dissolve the salt. It will eventually dissolve, just be patient. You do not need to shake vigorously or heat the water–just patiently flip the jar up and down until you can see that all of the salt has dissolved. If you shake it too vigorously, you risk sending some garlic and basil floating to the top. After dissolving the salt, replace the leakproof lid with the fermentation lid.

8. Ferment
Leave the jar to ferment for 5-7 days in a cool place. Room temperature is fine, but avoid direct sunlight or areas that might be prone to temperature fluctuations. In warmer weather, 5 days is probably enough, in cooler weather, 7 could be better. Ultimately, the vegetables are done when they are fermented to your taste. Tomatoes should be pleasantly fizzy inside when you eat one.
Storage
After tasting the tomatoes and determining they are done, you should move the jar to the refrigerator for long-term storage.
I recommend making fermented tomatoes in small batches. While these tomatoes will last several months in the refrigerator from a food safety perspective, for the best taste and texture, I believe they’re best eaten within a week. I would just make one quart at a time.
Tomatoes are very porous, and the longer they sit, the mushier they get. Eat them while they’re still crisp and fizzy!
Serving Suggestions
These make a delicious side dish for grilled meats. You can also eat them on salads.
My favorite use for these tomatoes is smashed on some toasted sourdough bread with a drizzle of olive oil. It is SO good!
Check out my fruit & veggie recipes for more ideas!
Would you like to save this?
Other Fermenting Recipes
If you want to eat more fermented veggies and want something super fun and easy to grow in the garden this year, try my fermented Mexican gherkins (cucamelons) recipe!
You can also check out my collection of whole-grain sourdough bread recipes.

FAQ
Kahm yeast happens occasionally when fermenting. It is a white, thready substance that usually results from too much exposure to air. It is technically safe to eat, but it is unpleasant to eat, so it’s best to try to avoid it.
You minimize your risk for kahm yeast by minimizing headspace in your jar (which also protects against dangerous mold) and try to avoid exposing your ferments to air. Yes, this means you should minimize taste testing. Every time you open the lid of your jar to taste test, you risk inviting the development of unwanted organisms, like kahm yeast.
Fermented tomatoes have a slightly acidic smell, and this recipe also has a potent garlic smell. They should not smell bad. If they smell rancid, something went wrong with your ferment and you should not eat it.
Botulism is not a concern in fermented vegetables. The salt brine and lactic acid make the environment inhospitable to Clostridium botulinum, which is the bacteria that causes botulism. However, good practices are still important. Just because botulism isn’t a concern for properly fermented foods doesn’t mean there aren’t other things that could develop, such as mold. Always work with clean equipment and follow correct procedures.
Make Fermented Tomatoes Today!
Give this super easy, gut-healthy snack a try. Let me know how it goes! Please leave a comment and review! It means the world!
Want to get new recipes delivered to your inbox once a week? Sign up below for my email list!
📖 Recipe
Fermented Tomatoes
Equipment
- easy fermenter lid or other fermentation lid
- Sharp Knife
Ingredients
- 3 cups cherry tomatoes
- 6-8 cloves fresh garlic
- 10 leaves basil
- 2 cups filtered, non-chlorinated water more or less depending on how you fill your jar
- 20-25 grams sea salt
Instructions
- Weigh mason jar on a food scale. Write down the weight of the jar in grams in case the scale gets uncalibrated during the process and you need to subtract it from the final weight. Then, tare the scale to zero.
- Give the garlic cloves and basil leaves a rough chop. Do not chop them too small–this will make them less likely to float to the top when you add water. Set aside.
- With the jar sitting on the scale, add a layer of tomatoes to the bottom of the jar–about 1/4 of the way full. Top with some roughly chopped garlic and basil. Repeat with another layer of tomatoes, followed by more garlic and basil. Do this until the jar is nearly full–just under the neck of the jar–you want to save enough room for the fermentation weight but do not leave too much head space, either–just enough for the fermentation weight, but do not place the weight yet.
- Carefully pour your filtered water over the vegetables in the jar until covered, but do not fill to the rim–save room for salt and fermentation weight. Check the scale & make note of the final weight of the vegetables and water. Write it down.
- Take the weight you just wrote down (of the water + vegetables) and multiply it by 0.025. This number is the amount of salt you will use in grams to make a 2.5% salt solution. This will probably be anywhere from 20-23 grams. Round to the nearest gram if needed. You can now remove your jar from the scale.
- Measure out the number you calculated for the sea salt into a small dish on your food scale. Pour the measured salt into your jar of vegetables and water. Place the fermentation weight on top and carefully press down–be careful so you don't overflow water everywhere. Screw a lid on the jar (I use my fermenting lid, but if you're not using an easy fermenter lid, you should use a regular lid for this part and add the fermenting lid after the salt is dissolved).
- Gently flip your jar back and forth, upside down and right side up, for a couple of minutes to dissolve the salt. It will eventually dissolve, just be patient. You do not need to shake vigorously or heat the water–just patiently flip the jar up and down until you can see that all of the salt has dissolved. Swap the lid for a fermentation lid if needed. See notes for more info.
- Leave the jar to ferment for 5-7 days. In warmer weather, 5 days is probably enough, in cooler weather, 7 could be better. Ultimately, the vegetables are done when they are fermented to your taste. Tomatoes should be pleasantly fizzy inside when you eat one.
- After opening the tomatoes, make sure you move them to the refrigerator for long term storage.
Video


Thank you so much for the clear instructions. These were a treat to make! We ate through them quick!
Yay, glad you loved it Jackie!