Easy Fresh Milled Wheat Bread Recipe – 100% Whole Wheat
This post may contain affiliate links.


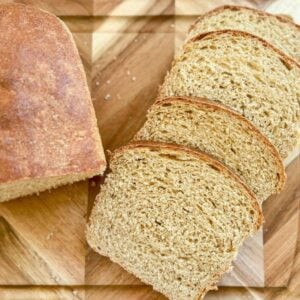
This 100% whole grain fresh milled wheat bread recipe is soft, fluffy, and best of all–easy to make! This nutritious recipe and the tips outlined in this post will be a game-changer for your baking!

Growing up, I had an obsession with Laura Ingalls Wilder (I mean, this entire website is named after one of her quotes). It’s one of my quirks, what can I say?
I was enamored with pioneer life in general and fascinated by the way they fed their families and cared for their homesteads. I’m not going to sit here and pretend my suburban kitchen is a prairie homestead, but when I say that I value the roots of my food, I’m not joking!
I’ve always had a love for baking, and like most people interested in nutrition, I have done my fair share of baking experiments using whole wheat flour. Many of them were flops.
For the longest time, I could not understand why it was so easy to bake white bread, but whole grain bread was so challenging.

Learning to Mill my Own Flour
Over the years, I learned quite a bit about baking, and given my inclination toward doing things from scratch, eventually that led to learning to mill my own flour.
Mills aren’t cheap, but I started with the Kitchenaid grain mill mixer attachment to see if I could do it. The Kitchenaid mill has a learning curve of its own, but eventually, I figured out a way to get good flour from it and I learned even more about baking excellent homemade bread.
After about a year, I upgraded to my Mockmill 200 and it is hands down one of the best appliance purchases I have made, but I acknowledge it’s a serious investment.
If it is out of budget, you certainly can get by with cheaper options, so do not fret! But having proven to myself that I loved baking with fresh milled flour, I knew it would be better to purchase the mill that I would want to use for a decade or longer.
For more baking tips for fresh milled flour, check out my fresh milled flour guide!

Baking with Whole Wheat Flour Vs White Flour
White flour is, well, white. It can be bleached or unbleached.
White flour is made by milling the grains and sifting the flour to strip them of the bran and wheat germ leaving just the fluffy white endosperm behind.
Store-bought whole wheat flour is made by adding a percentage of the bran and germ back to that white flour. That means it may not be entirely whole grain, but it has more nutrition than white flour.
When it comes to baking, the biggest difference is the density. Bran and wheat germ are denser than the endosperm, but it’s in the bran and germ where almost all of the nutrition resides.

Baking with Fresh Milled Wheat
Because of the density, the softness & rise you see with white flour breads may not be easily replicated with whole wheat. If that’s what you’re expecting, the first time you bake a loaf of whole wheat bread you may not get the results you think you will.
What that DOESN’T mean, however, is that you are doomed to heavy, dense, flat bread. There are some tricks you can employ to greatly improve results, but at the end of the day you must remember that whole wheat flour isn’t just white flour with food coloring–it’s a different food product.
If you appreciate the nutrition and flavor complexities of the whole grain while still enjoying soft and airy bread, you’re going to be very happy with this recipe.
Some people use additives like vital wheat gluten in their fresh milled wheat bread recipes to try to make up for the density of whole wheat flour. I used vital wheat gluten for a time, but I have moved away from it for most recipes now. I found with proper gluten development techniques it is not necessary, and I prefer to use simpler ingredients whenever possible.
A Learning Curve
Whenever you try something new in the kitchen that doesn’t work, do you say, “Well, I guess I’m not good at that, so I’ll just buy it at the store.” Or are you the type to say, “Hmm. This didn’t work. Let’s think about my process and make a plan to change something for next time.”?
When it comes to making your own bread with freshly milled flour, I’m asking you to try to be the second person.
Whole grain baking is a learning curve for most people. Try to find joy in the process so you aren’t frustrated if your first loaf isn’t perfect. I promise you, though–you are not doomed to bad bread with whole wheat flour. Soft, nutritious bread awaits you!
This fresh milled wheat bread recipe is easy and will lead to good results if you follow the tips in this post. However, there are SO many variables involved in baking that it would be impossible for any recipe to predict every situation in your kitchen perfectly (you’d be surprised what kinds of things can alter results! I’ve heard from many people who had to completely relearn a new baking process after moving because their old methods didn’t work well in their new homes).

Is White Whole Wheat Flour Healthy?
This fresh milled wheat bread recipe uses hard white wheat berries to make white whole wheat flour. White whole wheat flour is indeed whole grain flour. The use of the word “white” can be confusing because many of us automatically assume something like all-purpose flour or bread flour when we hear “white.”
However, white in this sense simply describes the color of the grain. The most common types of wheat grown in North America are varieties of red wheat and white wheat. This is the actual type of wheat, not a reference to its processing.
So yes, white whole wheat is a nutritious choice for whole-grain baking. It’s a great choice for those who want a lighter color and mouth feel to their baked goods.
Ingredients
To make our fluffy and soft fresh milled wheat bread recipe, you need the following ingredients:
Hard White Wheat Berries – I use 500 grams of hard white wheat berries which is just over 3 3/4 cups of flour when lightly spooned and leveled.
Olive Oil – This is one of our dough conditioners to improve taste and texture.
Honey – Honey is another dough conditioner that helps soften the bread.
Lemon Juice – Lemon juice is another dough enhancer that can help by increasing acidity and vitamin C. Many people, myself included, find a little bit of lemon juice helps keep the bread from being too crumbly.
Egg – An egg can make bread lighter and fluffier, not to mention enrich the taste. For this recipe, I’ve found one whole egg plus an additional egg yolk give the best results. Save the white in the fridge to add to scrambled eggs!
Instant Yeast – This recipe calls for instant yeast because all of the water is used to autolyze the flour which doesn’t leave any water to activate regular active dry yeast. I highly recommend quick yeast for this recipe.
Salt & Water – Typical bread ingredients
My instructions also call for the use of a stand mixer, such as a Kitchenaid Mixer. However, you can knead the bread dough by hand if you wish. You will also need a standard-size bread loaf pan.

Instructions
Follow the instructions below to make your own 100% whole grain fresh milled wheat bread:

1. Mill Flour
Start by milling your wheat berries into fresh flour. You want 500 grams of finished flour. This usually means I need to put about 501 grams of wheat berries in my Mockmill because sometimes I lose a tad in the milling process. You probably don’t need to worry about being as exact as I do, but I am who I am!

2. Mix Dough & Rest
Take your bowl of freshly milled flour and add 320 grams of room temperature filtered water to the bowl, followed by the egg & egg yolk, olive oil, honey, & lemon juice. Mix until there are no dry bits of flour left. Cover with a tea towel or plastic wrap and let sit for 30-45 minutes.
Freshly milled flour needs adequate time to truly absorb the liquids before it develops a good gluten structure. It may look like the water is absorbed, but it still needs that time. Don’t rush into kneading or you’re going to be kneading forever while your dough remains a pile of mush.

3. Add Salt & Yeast
Sprinkle the salt & instant yeast over the top of the dough. Mix it into the dough with the dough hook.

4. Knead
Knead your bread until it passes the “window pane test.” This takes me about 10 minutes with my Kitchenaid. I use the window pane test to determine if the gluten network is sufficiently developed–this is key to a soft, fluffy bread that rises well.
Using both hands, gently pull and stretch a section of the dough to see if you can make it very thin without ripping it. Be gentle. If it rips easily, keep kneading. Yes, the dough is sticky–this is normal with fresh milled flour. When kneaded, it should still form a ball, and it should still pass the window pane test.
See the photo above or watch my video in the recipe card to see the window pane test in action.

5. Rise
Cover the dough with a damp tea towel or plastic wrap and allow it to rise in a warm area until doubled (about 2 hours). If you are used to seeing white bread dough triple or even quadruple during its rise, keep in mind that we are just aiming for “doubling” with whole-wheat bread due to its density.

6. Shape
Once doubled, set some parchment paper into your bread pan. Pour the dough out onto a clean work surface. The dough will be sticky–lightly wet your hands to keep the dough from sticking to you. I also recommend a bench scraper to assist in shaping.
Lightly flatten the dough into a rectangle, tri-fold the edges into the middle, and then roll it up like a burrito (see my video in the recipe card for a demonstration. There are other shaping methods–you can do whatever you’d like). Place the shaped loaf seam-side down into your bread pan.
Resist the urge to add flour as you shape–you will make the bread drier and more crumbly. It is normal for the fresh milled wheat dough to be stickier than white dough. Trust the process.

7. Proof
Cover the bread pan with a damp tea towel and let your bread do a second rise in a warm place until doubled in size and poofy in your pan. Toward the end of the proofing time, preheat your oven to 350 degrees F.

8. Bake & Cool
Bake your loaf for about 40 minutes or until the internal temperature reaches at least 190 degrees F.
Check the loaf with a meat thermometer to make sure it’s fully baked. This little trick will save you from having a gummy loaf, as will making sure to let your loaf cool completely before slicing.
If desired, spread a small amount of butter on the hot crust. This will make it shiny and keep it soft.
After you remove the bread from the oven, let it sit in the pan 10 minutes, then grab the edges of the parchment paper to remove the loaf and set on a cooling rack to finish cooling.
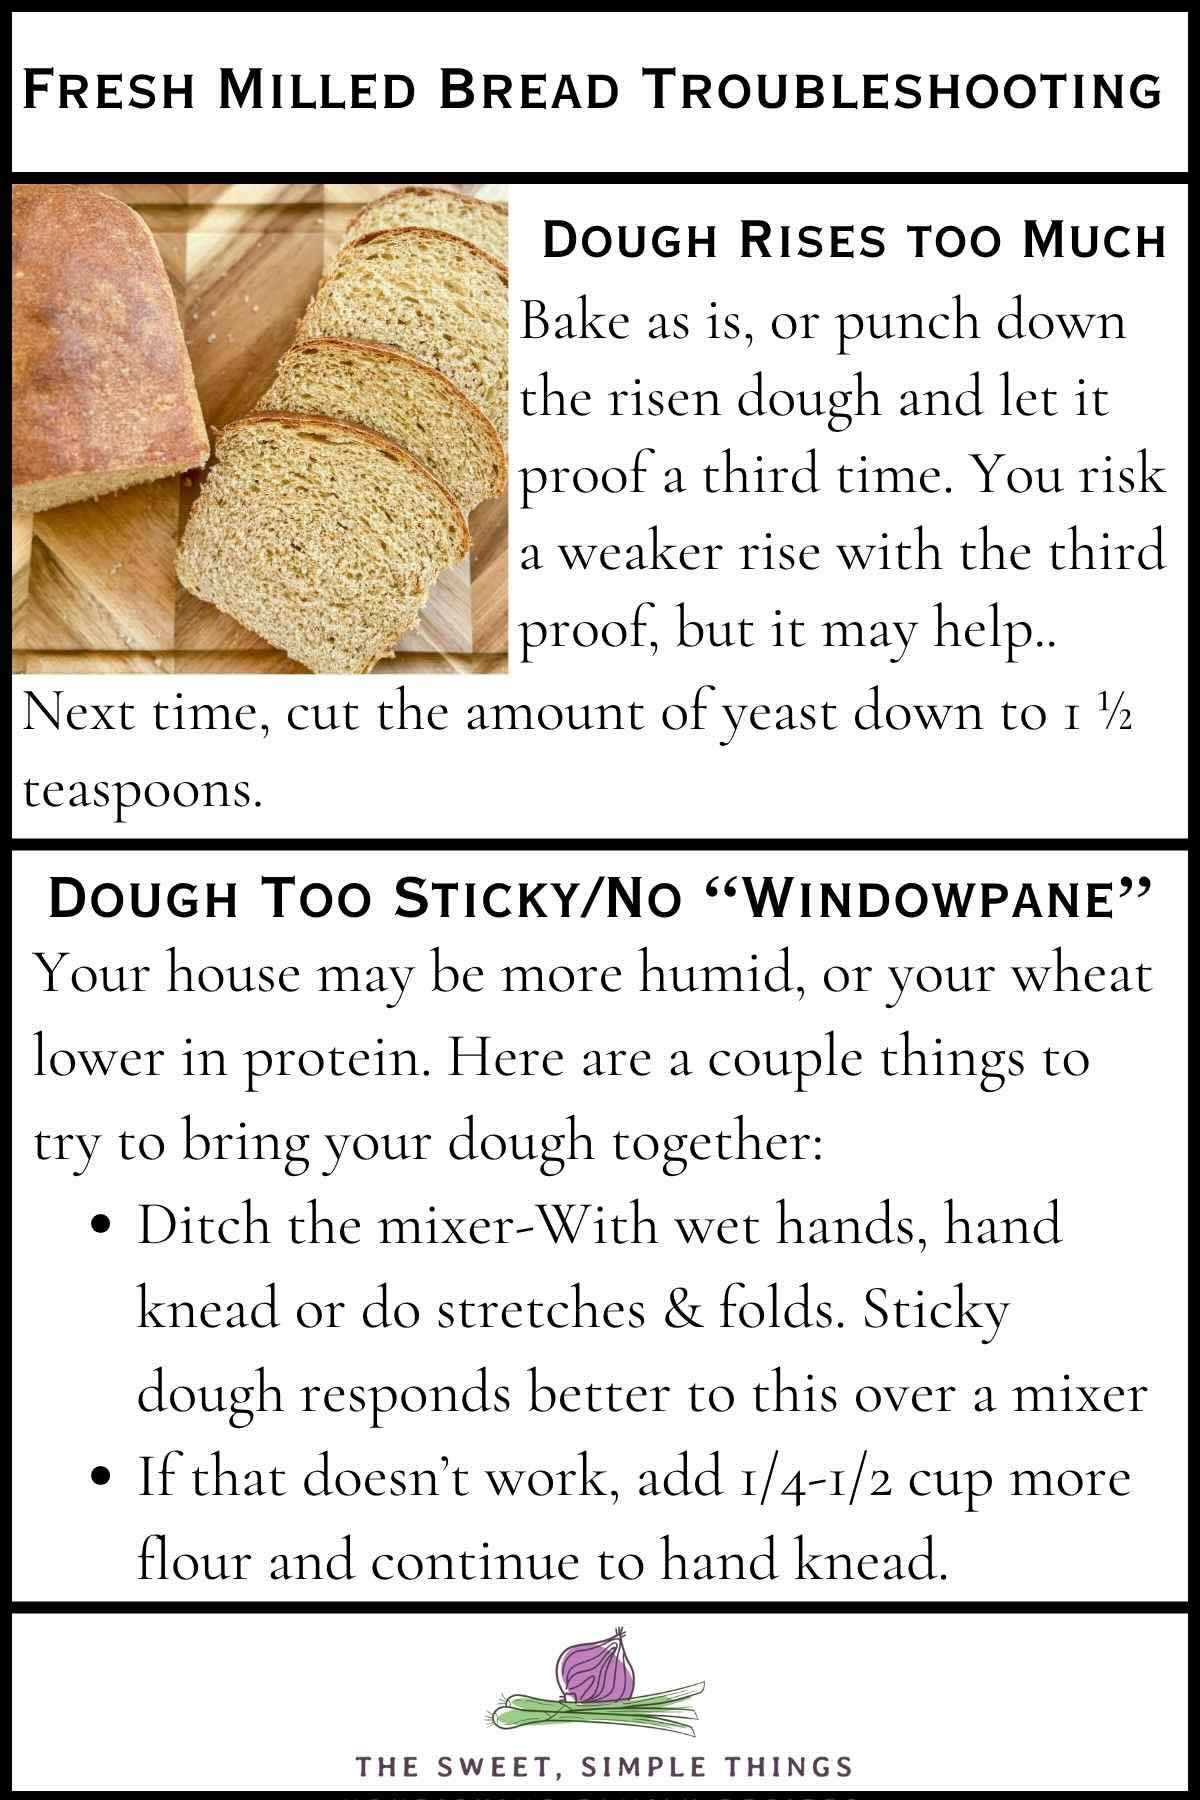
Fresh Milled Bread Troubleshooting 101
I am adding this section as of October 2025–Earlier in this post, I mentioned that some people have to completely relearn how to bake when they move due to the changes in their environment… guess who that applies to now? Yours truly!
After moving to an old farmhouse in a new state this past August, I really struggled with this recipe. My old house had low humidity, this house is much higher humidity.
Would you like to save this?
I also got a new batch of red wheat when I moved that I suspect is lower in protein than prior batches I’ve purchased. (Did you know that each crop can have different protein percentage, among other inconsistencies, due to weather and other growing conditions?)
Anyway, here are some of the things I’ve learned through troubleshooting:
Tips & Variations
You can easily double this recipe to make multiple loaves of bread!
You may also enjoy trying different wheat varieties. Hard red wheat also works very well for this recipe. You may also try to incorporate some ancient grains like spelt or einkorn. I do not recommend fully replacing the hard white wheat with either of those for this recipe as that has not been tested, but you could replace between 50-100 grams of the total flour with an ancient grain if you wish.
Nutritional Information
This recipe makes 12 slices of bread. For one slice, the nutritional information is as follows:
- Calories: 170
- Protein: 6.3 grams
- Fat: 2.6 grams
- Carbs: 33.2 grams
- Fiber: 4.7 grams
Recipe Notes
Store your bread wrapped in beeswax wrap or in another airtight container. Eat the fresh bread within 2-3 days. If you cannot finish it within a few days, I recommend freezing part of the loaf.

Other Whole Wheat Bread Recipes
If you love milling your own grain to make delicious bread, you’ll love my baking section! All of my recipes have been tested with both fresh milled flour and bagged flour, so you can know the instructions will work. For an organized list of fresh milled flour recipes, check out this post.
If you need a quick whole grain bread to get on the table fast, try my whole wheat Irish soda bread or fresh milled pita bread. If you prefer sourdough, try my 100% whole wheat sourdough sandwich loaf made with whey or my 100% whole wheat sourdough bread! You may also enjoy my red wheat sourdough recipe.
For an all-in-one freshly milled flour meal, try my whole wheat sourdough bierocks or my fresh milled flour pizza dough! For a delicious sweet treat, you’ll love my whole grain cinnamon rolls.
Treat Yourself to Fluffy, Whole Wheat Bread Today!
Interested in trying to bake with fresh milled wheat? Let me know if you have any questions in the comments below–I’d love to help! If you make this recipe, I want to know how it went for you.
📖 Recipe
Fresh Milled Wheat Bread
Equipment
- Kitchenaid Mixer recommended for kneading
- Bread Pan 9"x5"
- Grain Mill or other method for milling grain
Ingredients
- 500 grams white whole wheat berries roughly 2 1/4 cups berries
- 290-320 milliliters water about 1 1/4 cups, measured by weight: 290-320 grams
- 1 whole egg
- 1 egg yolk
- 2 tablespoons honey 42 grams
- 1 tablespoon olive oil 14 grams
- 1 tablespoon lemon juice 15 milliliters/grams
- 10 grams sea salt about 2 tsp
- 2 1/4 teaspoon quick rise yeast
Optional
- 1/2 teaspoon butter optional–for crust after baking
Instructions
- Mill your wheat berries into a fine flour. Place flour in a mixing bowl.500 grams white whole wheat berries
- Add the rest of the ingredients except for the salt and yeast. For the water, start with the lower measurement, and increase if you think your dough can handle a little more hydration. See notes for more info. Mix everything together until combined, and then let sit for 30-45 minutes.290-320 milliliters water, 1 whole egg, 1 egg yolk, 2 tablespoons honey, 1 tablespoon olive oil, 1 tablespoon lemon juice
- After the rest period, sprinkle the salt and the instant yeast on top of the dough. Using the dough hook on the mixer, mix the salt & yeast into the dough.10 grams sea salt, 2 1/4 teaspoon quick rise yeast
- Knead the bread dough (I use speed 2 on my Kitchenaid) for about 10 minutes until the dough passes a window pane test (see picture below, or watch my video if needed).

- Cover the dough and let it do its first rise in a warm place until doubled, about 1 1/2 hours.
- Punch the dough down and scoop it out of the bowl onto a clean work surface. If you flour it, do so very lightly as you do not want to add much more flour to the loaf. Flatten the dough into a rectangle about the length of your bread pan. Tri-fold the edges of the dough rectangle, then roll the dough up to shape into a loaf (see video if needed). Pinch the ends of the dough. Place it in the bread pan seal-side down. Cover and do a second rise until puffy, about 1 to 1 1/2 hours.
- Toward the end of the second rise, preheat the oven to 350°F.
- Bake for 40 minutes or until the bread reaches an internal temperature of at least 190°F. Spread about 1/2 tsp butter on top of the hot crust if desired for softness. Let bread cool before slicing.1/2 teaspoon butter

Video

Notes
- Dough Rises Too Much: Do not let the dough proof too long–you should always go by the dough’s readiness, not by the clock. Proof in a cooler location if needed.
- Dough Too Sticky or No Window Pane:
Your dough may have too much moisture (too much water, or your house may be more humid), or your wheat might be lower in protein. Here are a couple things to try to bring your dough together:
- Ditch the mixer-With wet hands, hand knead or do stretches & folds. Sticky dough responds better to this over a mixer
- If that doesn't work, add 1/4-1/2 cup more flour and continue to hand knead.


I cannot saw thank you enough for stating how much wheat berries are needed opposed to just milled flour. So helpful for us beginners
Glad you found it helpful! 🙂
What size bread pan do you use? I’ve historically used a 13″ pan for a “full” store bought loaf size, but yours looks smaller?
Yes, mine is smaller than that. I use a 9×5. However, I recently got a pullman pan so am working on scaling the recipe up for a larger pan like that. 🙂
I tried this recipe and it turned out yummy taste just like store bought, so I only had soft white wheat berries, no lemon or olive oil so I put regular vegetable oil and added half a cup of self rising flour because I didn’t know what else to do, but it turned out great, thank you for the recipe
Glad you liked it! 🙂 lemon juice is optional really, it just adds a bit of vitamin c which is a dough conditioner, but you can certainly go without!